I’ve had the most fun putting together this project. But, I honestly feel like it needs one more detail.
Color!
Let’s go back to the beginning . . .
Once I had the idea in my head I set out to find the perfect elephant. I found my plastic elephant toy at a craft store and asked Hubbs to remove his head. After a quick look of horror, I managed to convince him it would turn out as planned (at least he was convinced). FYI, he used a hand saw to remove the head quite cleanly. Then I took him outside and spray painted his head. (I love how he almost looks like he’s smiling!)
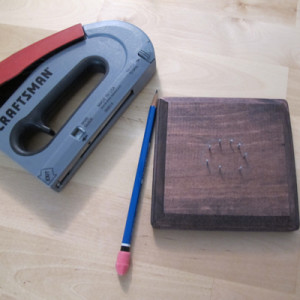
The tusks were particularly tough to get coated but the antique gold treatment finally worked. I gave him 2 days to cure completely and then it was time to get him mounted. I used a piece of pre-cut craft wood to mount him on and stained it with a walnut stain. I traced the base of the elephant and then, following just inside the line, I filled it in with brad nails. I used a pencil to make sure the nails were about 1/4 inch above the wood. Then I put a line of super-strong, Weldbond glue along the traced line. The brad nails won’t hold the elephant up but it helped brace it in place while the glue dried.
Here he is, in his special place, on the wall. I feel like he needs a little hit of color. What do you think?
I’m thinking I need to paint a solid border around the outer edge of the wood and I’ve narrowed it down to a chartreuse green, bold red, or maybe a robin’s egg blue. I’d love to know what you think!


